Tuesday, July 31, 2012

Where She Sews


In honor of the final day of the virtual studio tour sponsored by Pink Chalk Fabrics I am going to share the sewing/creative space of one of my readers, Jolene, who sent me photos of her sewing/work area, her space was also featured in the virtual tour mosaic on the Pink Chalk site.

This is her sewing/craft area where she carved out room behind the sofa so she would have some place to work on projects which could be somewhat contained and out of the walkways.

Just by turning around she can work on her graphic arts at her computer stations with easy access to books and business supplies on the shelves next to her computers.

Her space is compact but very, very functional with great light and an excellent use of storage space.  You can check out the rest of her room makeover on her blog at www.ajewelddesign.blogspot.com , have a look; she has some great craft projects and graphic design advice.

Jolene thanks for sending me photos of where you sew/craft so I could share them with my readers.  I hope you all got a chance to go to the Pink Chalk site and view all the featured sewing studios as well as the virtual tours of the readers on the mosaic wall, if not, use the hot button on the side bar and it will take you there.  It was such an honor to be part of the virtual tour; I had a great time all month looking at the many, many fantastic large and small creative spaces.

Thanks for letting me share where Jolene sews and the Pink Chalk Fabric virtual tour with you.  Up next is the sweat suit upcycle tutorial which was lots of fun to do.  Following the tutorial will be a building block quilt; I am working away on that sweet little quilt right now, watch for it.
See you soon.

Laurette

You might also like:

Where I Sew
Fabric Organization – (January 2012)


Monday, July 30, 2012

Coats and Clark 200 Years


This year Coats & Clark thread celebrates its 200Th Anniversary.  Their story began in 1812 in Paisley Scotland with the conversion of their crippled weaving mills, which once produced luxurious silk shawls, into mills which produced cotton threads.  From there a shortened version of their long history begins with the introduction of a new cotton thread to American women in 1826 by English sailing captains who brought it over from England.  These new threads were then used in the latest women’s fashions all over America.

A soft finished thread was produced by George Clark in 1866 and was the first thread suitable for the sewing machine, revolutionizing the thread industry. George called it “Our New Thread” which became known as O.N.T., a thread many of you still have in your thread collections.

In 2007, as sewing machines became more and more advanced the need for more controlled variables in thread consistency became necessary. The demand was recognized by Coats and Clark who produced a more consistently smooth thread known as Dual Duty XP, which most of us are currently using in our sewing machines, hand stitching and mending. The photo above shows spools from my collection which depicts some of the changes in the labeling and spools as the thread evolved from wooden spools, to golden spools, to white plastic, which is being sold and used today.

Many of us have been stitching with these threads for years not really knowing the history behind such a valued staple in our sewing rooms. I thought I would share just a bit of their history with you and encourage you to go to their website, coatsandclark200years.com, to read the full story. I read a number of different publications who featured stories about the formation of the company over the last 200 years and found each one to be fascinating, the website is the best of the versions.  Along with the story about the company you can also read, “Share Your Stories”, where they invited their customers to write a story about their sewing experiences. I entered one of my stories on June 12, 2012 which you can read by going to my side bar and clicking on the Coats & Clark hot button, it will take you to my story as well as lots and lots of other wonderful sewing stories, give them a read you will have a great time.

Thanks for letting me share the 200Th Anniversary of Coats & Clark Thread; I really wanted to share it with you for some time now.  Up Next, to honor thread, I will be showing an upcycle sewing project, part 2 of the sweat suit remake, watch for that in a few days, it will be full of how to photos.
See you soon.

Laurette

You might also like:

Sweatshirt To Jeweled Jacket- Tutorial
Bling Those Shoes – Parts 1&2


Friday, July 27, 2012

Under Construction


Hello everyone, I wanted to give you a quick update and let you know my blog is under some technical construction while we do some updates and make some small changes, most of which you will not even notice.  A couple of new items will appear, hot buttons for Facebook, Twitter and a few other social networking sites will now be available so you can" Like Us" on those sites, those should appear at the bottom of each new posting. We would all be thrilled if you did that whenever you like a photo, pattern, project or post, don't be shy.  We also have a " comment " button you can click on and make a comment on the post you just saw, if you take the time to comment I will do my best to read it and respond back to you as soon as I can, we love to hear from you. (please note: these hot buttons, appear very small so you will really have to look for them, the size is not in our control).  We at Buttons, Bows & Bling strive to do our very best for our readers so we have joined the social networking scene to have the latest up to date information and ideas, we hope you will join with us in moving us forward in that arena.

Construction should be finished this weekend, I will return with a new posting which I hope will be waiting for you Monday morning, fingers crossed.  Thanks for hanging in there with us this past year as we made our way through a new frontier, we have been having a great time and we can't wait to share more creative projects with you as summer winds down and fall begins.
See you soon.

Laurette

Tuesday, July 24, 2012

Baby Shower Bliss


The baby shower my daughter and I gave for my daughter-in-law is finally over; it just flew right by in the blink of an eye.  We truly had a really great time getting ready for it by creating all our projects and then decorating the party spaces with all our goodies.  As promised I have some photos of those spaces all decked out in blue and white, sit back, relax and enjoy!


This area is my kitchen island where we set up for the food and drinks.  You can see all the little touches we added to bring our theme into this room.


We chose cupcakes instead of the traditional shower cake; they were absolutely yummy, as were the rest of the decedent desserts.  Thank goodness we chose to make a refreshing rainbow sorbet punch, French Lemonade and ice tea to drink; it was almost 100 degrees that day.


The sign in table was just darling with its white mums, balloons, confetti, and mini yellow rubber ducks.  Our gift table sat in front of the window so it was hard to get a decent photo but you can see the balloons, confetti filled table and the baby bunting hanging above the table, it was a really cute area.

Gosh there were tons more photos to share, I took about 100, I think I will stop here or it will take you all day to look at them. Since I didn’t do a double post Monday, I will share the last minute decorating project I did because I needed to pull the whole room together for a cohesive look.


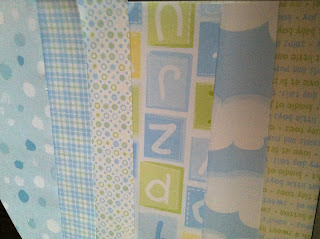
A few days before the shower, when we began the mock set up for the shower, we realized we needed something around the gift table to tie it into the rest of the rooms.  I came up with the idea to make a paper baby bunting to hang over the table using the same scrapbook papers we were decorating the kitchen island and the sign in table with. I cut out large triangles, stapled them together, added jumbo rick rack across the whole top of the row, glued on vintage buttons to the ends of the triangles, and decorated the flags with embossed stickers and tags.  They came out so darling, they really fit the space and completed the room.


My very last project was to fill the favor bags with the flower pens, notepads and the charm pins.  The gift bags really came out cute with everything all in one place; they were a hit with the ladies.

Thanks for your patience with all the projects and photos of the baby shower, I promise this is the last of the baby boy blues for that event.  I hope you got some great party ideas you can adapt for your next event.  It is now time to move onto other projects and new adventures from my studio, I am not sure what’s up next but I do know I have a number of projects waiting to be shared with each of you.
See you soon.

Laurette

You might also like:

Finishing The Blues
Baby Boy Charm Pins
Blue & White Flower Pens
Note Pad Blues


Thursday, July 19, 2012

Taking A Moment

It is party time on Saturday, I am taking a few moments to catch up, then finish up all the little details before my son and his wife arrive Friday evening for their baby shower the next day.  I have enjoyed sharing all the projects we did for this special event, I plan to share some party photos with you early next week.  So..... for now, I am taking time to stand still........ breath......and think.  I will return very soon, see you then!****

Laurette

Sunday, July 15, 2012

Finishing The Blues


Thanks to my daughter we were able to complete one of our last projects for the shower next weekend, at least the ones she could help me with. Here are some photos of our newest creation.

We gathered together some of our bits and pieces did some brainstorming and went to work transforming some empty Starbucks Frappucino bottles into fun party drinking glasses. I love the shape of these bottles and have been collecting them for years using some of them to store pencils, paintbrushes, buttons and an odd assortment of embellishments, the rest of the bottles have been stored away waiting for a project.  We soaked off the labels in super hot water then ran them through the dishwasher to sterilize them, all ready to decorate.


We wrapped the clean bottles in foam wrap, tied some colored twine around the foam wrap and finished them off by threading the twine through some retro blue buttons from my collection, tying them off with a bow. Super darling with coordinating striped straws, placed on a Winnie The Pooh serving tray, how cute is that, recycling at its best!


We got our inspiration from one of my favorite creative magazines, Stitch/Craft Create; we saw their darling bottle makeovers on a number of pages and decided we could do something like that with my collection of bottles to fit our theme.  You just never know where your next idea is going to come from.

Thanks for letting me share these fun little drinking glasses with you; we had a great time making them.

Most of you will be reading this on Monday so guess what time it is???........
It is double post Monday!!! Instead of sending out two different postings I am going to put them both on one page for easy reading. This next project was a result of some project leftovers from the charm pins.

I really wanted to make myself a baby boy charm bracelet to wear to the baby shower; I am the grandmother after all.  We had plenty of silver charms leftover and one of each of the enamel charms, I had some silver jump rings and a double strand silver chain, just enough to make my bracelet. It has been a while since I did any jewelry making so it took me a bit to get the fingering just right but eventually I figured out how to get everything going in the same direction and I was off and running.

My bracelet came out just beautiful and looks really sharp against the blue background.  I am very happy with it and I can’t wait to wear it to the baby shower.

Thanks for letting me share all of my baby shower projects with you this past couple of weeks; it was a lot of fun seeing what we could make ourselves instead of just buying everything ready made.  I just have a few things to stitch up for the baby, I am hoping I can get to them before Saturday, keep good thoughts for me.
See you soon.

Laurette

You might also like:

Baby Boy Charm Pins
Blue & White Flower Pens
Note Pad Blues
All About Babies
Back To Babies

Friday, July 13, 2012

Baby Boy Charm Pins


This is going to be a quick post even though the project I will be sharing was not quick at all, in fact it was very time consuming. My daughter and I decided we wanted to make a memorable baby shower gift which would not just be thrown away in a few months, we wanted to create something which would last for a long time; we chose to make charm pins featuring silver and enamel baby charms.  Little did we know, when we picked out all the embellishments, it would be so labor intensive attaching all the little charms and ribbons.  It was a lot of fun and went really well once we got a rhythm going between us, good thing there were two of us or I would be working on them until the night before the baby shower.

I gathered some of my jewelry making tools and jump rings along with all the charms and the pins we shopped for and bought on line. We did a test run to see how things would look and got to work once we agreed on assembly style, no two pins are alike.

Some of the pins before we attached the ribbon and the backing cards my daughter designed just for them.

A close up of the test pin we used to help us choose ribbons and what kind of mounting paper or card they would be attached to.

These are some of the charm pins completed and displayed on their cut little baby boy cards.  They really came out darling, our jewelry making skills and my daughter’s graphic arts talent really helped us create a one of a kind gift for each of our guests.

Thanks for letting me share our Baby Boy Charm Pins with you even though it was just a quick post.  I think I have just one more baby shower project to share with you, but who knows, I may do one or two more things before the party.  Next week I will be sharing the rest of the gifts I am making for the baby, keep checking daily so you can keep up and not fall behind.
See you soon.

Laurette

You might also like:

Blue & White Flower Pens
Notepad Blues
All About Babies
Back To Babies

Thursday, July 12, 2012

Blue & White Flower Pens


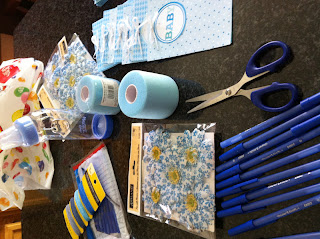
Project number two was to make some really cute flower pens for each of our guests to use during our party games.  I guess I could have just bought some blue pens and left it at that but then I would not be me if I did not add a bit of floral bling to those basic blue pens.

Off to Target and Michael's to get some pens, paper flowers and some foam wrapping tape, all in our blue and white baby boy theme.


This was not a very difficult project, just a time consuming one, with wrapping each pen and flower with the foam wrapping tape and getting it to stick the way I wanted it to, some double sided tape did the trick.  They are really darling and look so cute with the little notepads I made earlier, what a nice set to send home with the ladies along with a few other surprises.

Thanks for letting me share my Blue & White Flower Pens with you, I will be working on the party favors next, just a small hint, think jewelry.  It is time to go, lots more to do after I clean up my huge mess and start a whole new one. (Sigh)
See you soon.

Laurette

You might also like:

Notepad Blues
Fun Fabric Animals
All About Babies
Back To Babies
Pretty in Pink


Related Posts Plugin for WordPress, Blogger...