
As you know I have been
working on a little “facelift” for our guest bath; creating all kinds of
projects to give it some elegant glamour and I finally just finished the last
of my projects. Woohoo!!! My final project was to make a new valance to
go over the bathroom window, something to tie everything all together. I searched through all of my resources and
did not find any inspirational ideas for valance style; however, they did help
me to decide on the fabric type, color and pattern I wanted to use. I chose (from my fabric stash) a nice home
decor heavy weight fabric in a black and white toile print. Take a look.

This is the plain window with
2” wooden blinds already up and a basic white shower curtain, nothing special
to look at here.

This is the fabric I had
several pieces of in my stash, wonderful remnants I got at the fabric store for
a steal, super pricey otherwise. The fabric is “Rustic Toile” by Waverly
Fabrics from the home décor line, about 1 yard long. When I am working with an
expensive piece of fabric which is going into a room where it may not stay for
a long time I try to sew it up in a way which allows me to re-use it
later. Instead of cutting the fabric I used
the whole piece by pressing the selvages under on the sides then folding it in
half to create a self lining and turning down the top edges to make the rod
casing and using the largest stitch allowance my machine would sew. The long stitches are easy to take out if I
ever want to turn the valance into whole fabric again.
Once I had the casing
finished I hug the valance giving it a bit of pouf but I felt it was missing
something. I went to my notions stash
and looked for something to give it a pop of black because the light print
faded into the very white shower curtain right next to it creating a lack of
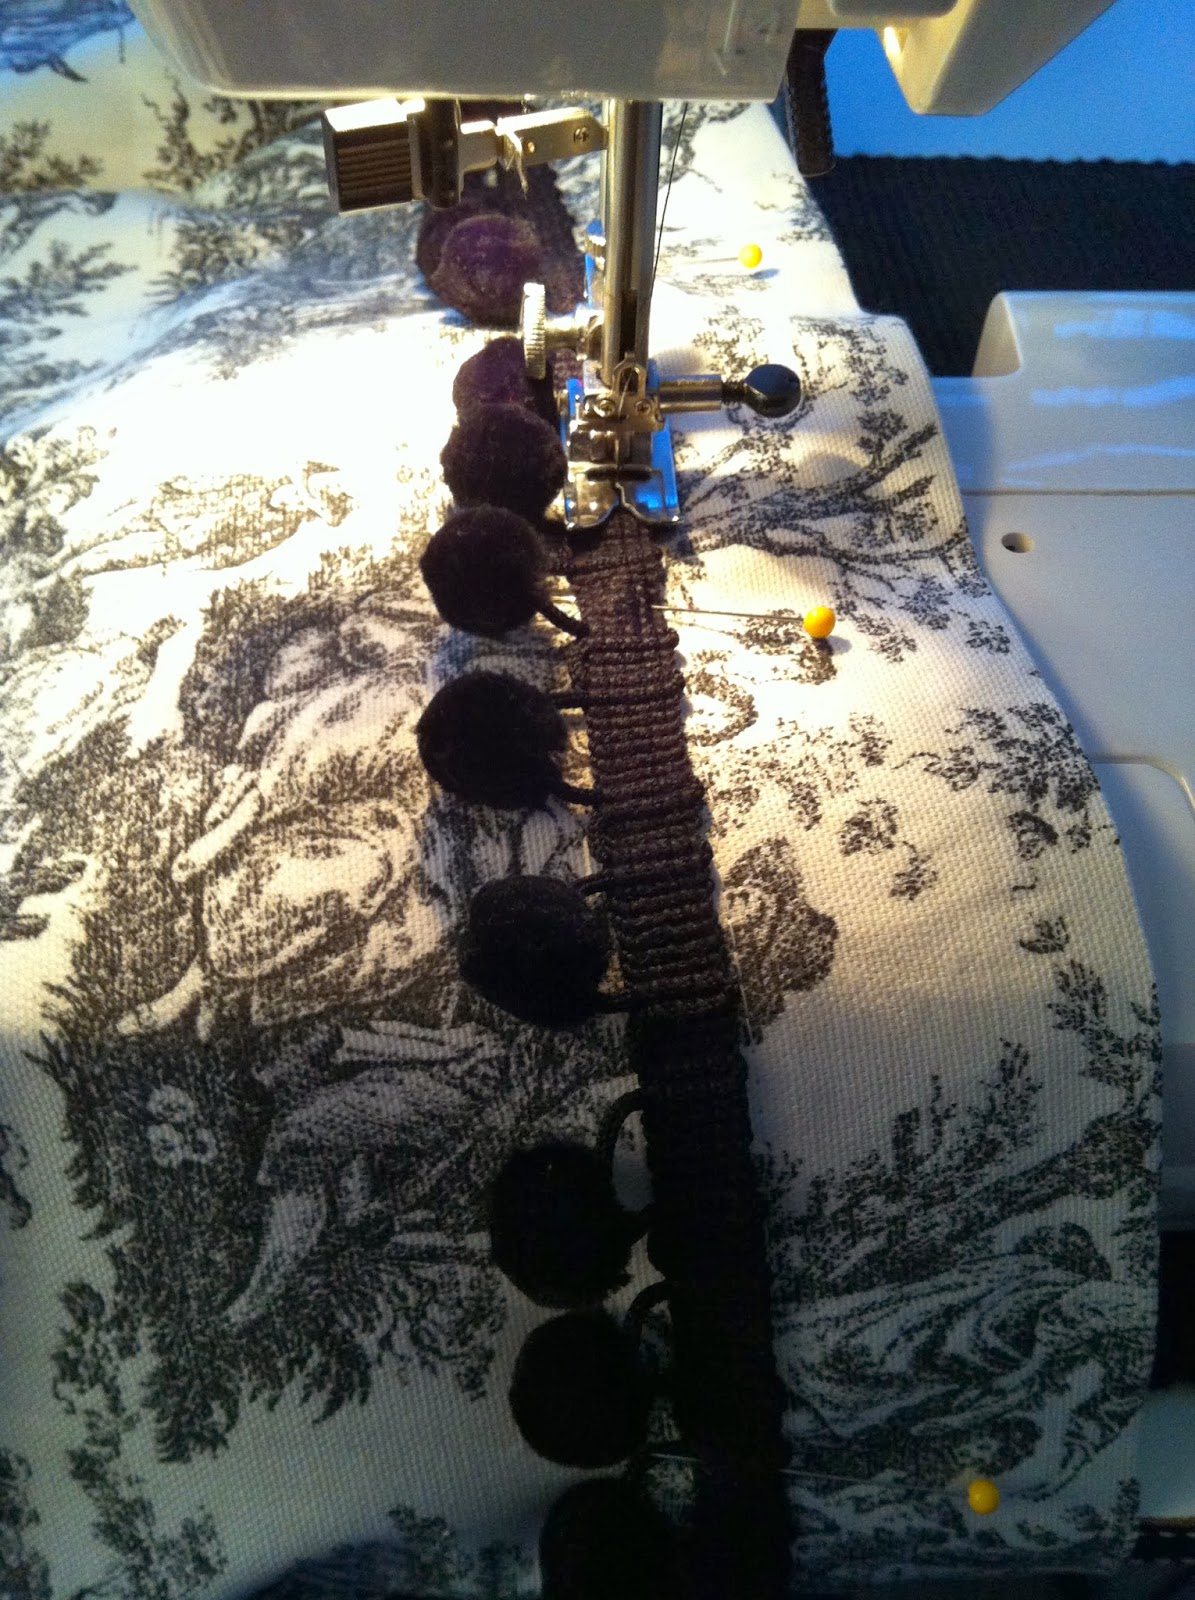
contrast. I found some really pretty
French jet black pom-pom trim which seemed to pull out the black and give it
more definition. I simply used the same
stitch length to sew it just below the casing stitching, easy to remove later
down the line if I wanted to re-use either of the items.

Here we are all done and
already hanging up right over the window.
I just love me some toile, I would put it everywhere if I could get away
with it! I cannot show you how well it adds contrast with the shower curtain
right now… you have to wait to see the whole thing in the reveal in my next
post. Hehe!!!
Thanks for letting me share
my final bling project for the guest bath facelift; I am very pleased with the
results so far, I cannot wait to see what you all think.
See you soon.
Laurette
thankyou. It was great post
ReplyDelete